Creating & Editing Events & Tickets
This section on Events Made Easy (Eventbrite) focuses on creating and editing events and setting up the basic and more detailed information.
Beaufort 12 is a separate company from Eventbrite. If you have questions about Eventbrite, please reach out to them Directly.
We recommend you first read our Quick start guide. Please also review how Billing works to ensure you are happy with our fees.
There are 4 main elements to create an event:
Event details
Create tickets
Additional settings
Design and manage pages - where all other settings are managed
Creating a new event
In Salesforce, click the Eventbrite events tab. If there are previous events, Recently viewed events will be displayed
Click New on the top right menu. This will take you to the Eventbrite system, where you can create the event.

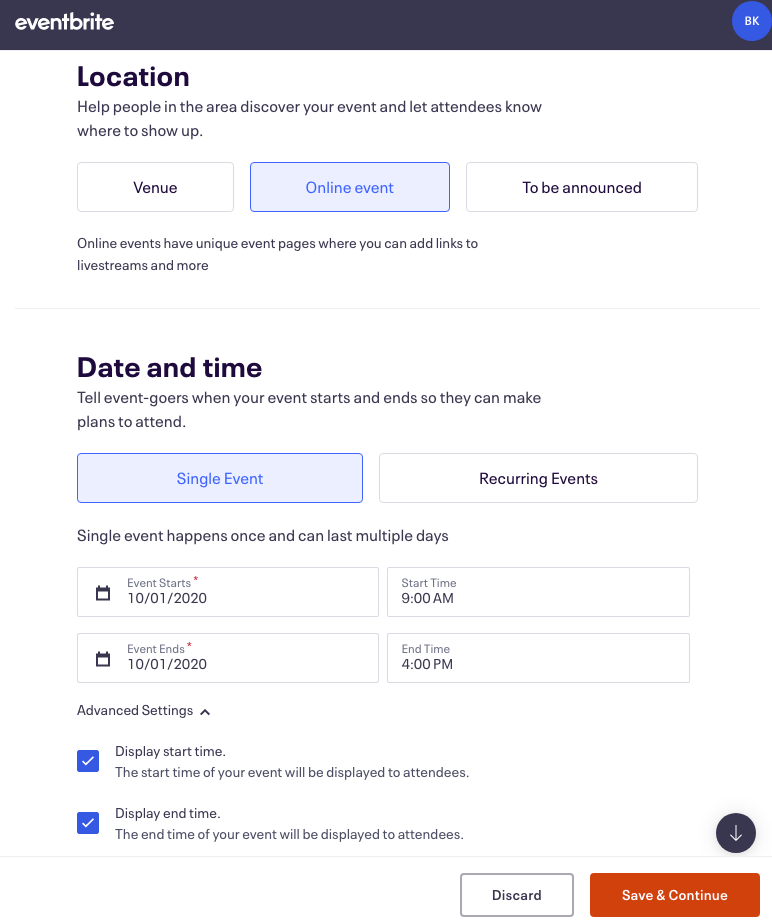
Event Basic Info
This page contains Basic info to add including Event title, type and organizer.
Add in the necessary Basic info including event name.
Input the Location with full address for a Google map of the location to be viewed.
Set the Date and time making sure to check you have the correct time zone, displayed in Advance settings.
At the bottom right hand of the screen click on Save and Continue.
.png)

Event Details
On the Details page additional information can be added.
To add a Main event image, just drag and drop an image in place. In the Description summary, you can input important details about the event. Images and videos can also be added.
At the bottom right hand of the screen click on Save and Continue. This takes you to the Create your first ticket page.
.png)
The Create your first ticket page on Event Made Easy (Eventbrite) focuses on creating and editing ticket information and setting up the basic and more detailed information. This all occurs in the Eventbrite application.
Create a new ticket
Once you have created the Event, you can now create tickets for that event. Follow the steps below to add tickets (for detailed steps: Creating & editing events & tickets)
Select the Type of ticket to create, 'Paid, Free, Donation'.
Create a Custom name for the ticket, this will appear on the event listing and on mobile tickets and email order confirmations.
Add the Quantity of tickets required of this ticket type. This number can be changed later even after publishing the event and selling tickets.
Add the Price of the Ticket, not including fees. Tickets can also be free (fees are not charged for free tickets) or if you chose the donation type ticket, no fee will be charged.
Ticket sales start/end needs to be amended so the specific start and end date and time is provided. If there is more than one ticket type, sales can begin when sales end for another ticket type (i.e. having early bird tickets followed by general admission tickets).
.png)
Click on Advanced settings to add a description, select visibility, number of tickets and sales channel.
Add a Description to provide attendees with more information on the ticket.
Select Visibility, this controls which ticket types attendees can see.
Add the minimum and maximum quantity Tickets per order to be sold.
Select the Sales channel of where the tickets will be available to buy.
Click Save when the changes have been made
The page shows you the ticket information, then click to Publish.
To add an additional ticket for the same event, click on Create ticket and repeat the process. All the tickets created for this event will be shown on the Tickets page.
.png)
Event dashboard
The Event dashboard shows an Overall summary of ticket sales information. From here you can also view reports on attendees.
.png)
Edit and View Event Details
To later view and edit event details, go back to Event Made Easy (Eventbrite), Eventbrite events page, which will display the Recently viewed events.
Click on the Event ID which will bring you to an overview Event details page in Salesforce.
Here you can view Net sales, ticket sales, event start and end date, description and sales by ticket type.
On the top right hand of the page you can select Reports, View, Edit, Refresh.
Click on View, this takes you into Eventbrite and shows the Event's ticket page

Click on View, this takes you into Eventbrite and shows the Event's ticket page
On the top right hand of the Salesforce Eventbrite events page, Click on Edit, this takes you into Eventbrite and displays the event information page where changes can then be made.
.png)
If changes are made on the event within Eventbrite make sure in the Event Made Easy (Eventbrite) event details page, click the Refresh button on the top right hand side. Sometimes if after a refresh the information is not updated you may need to refresh your internet page in case of caching.
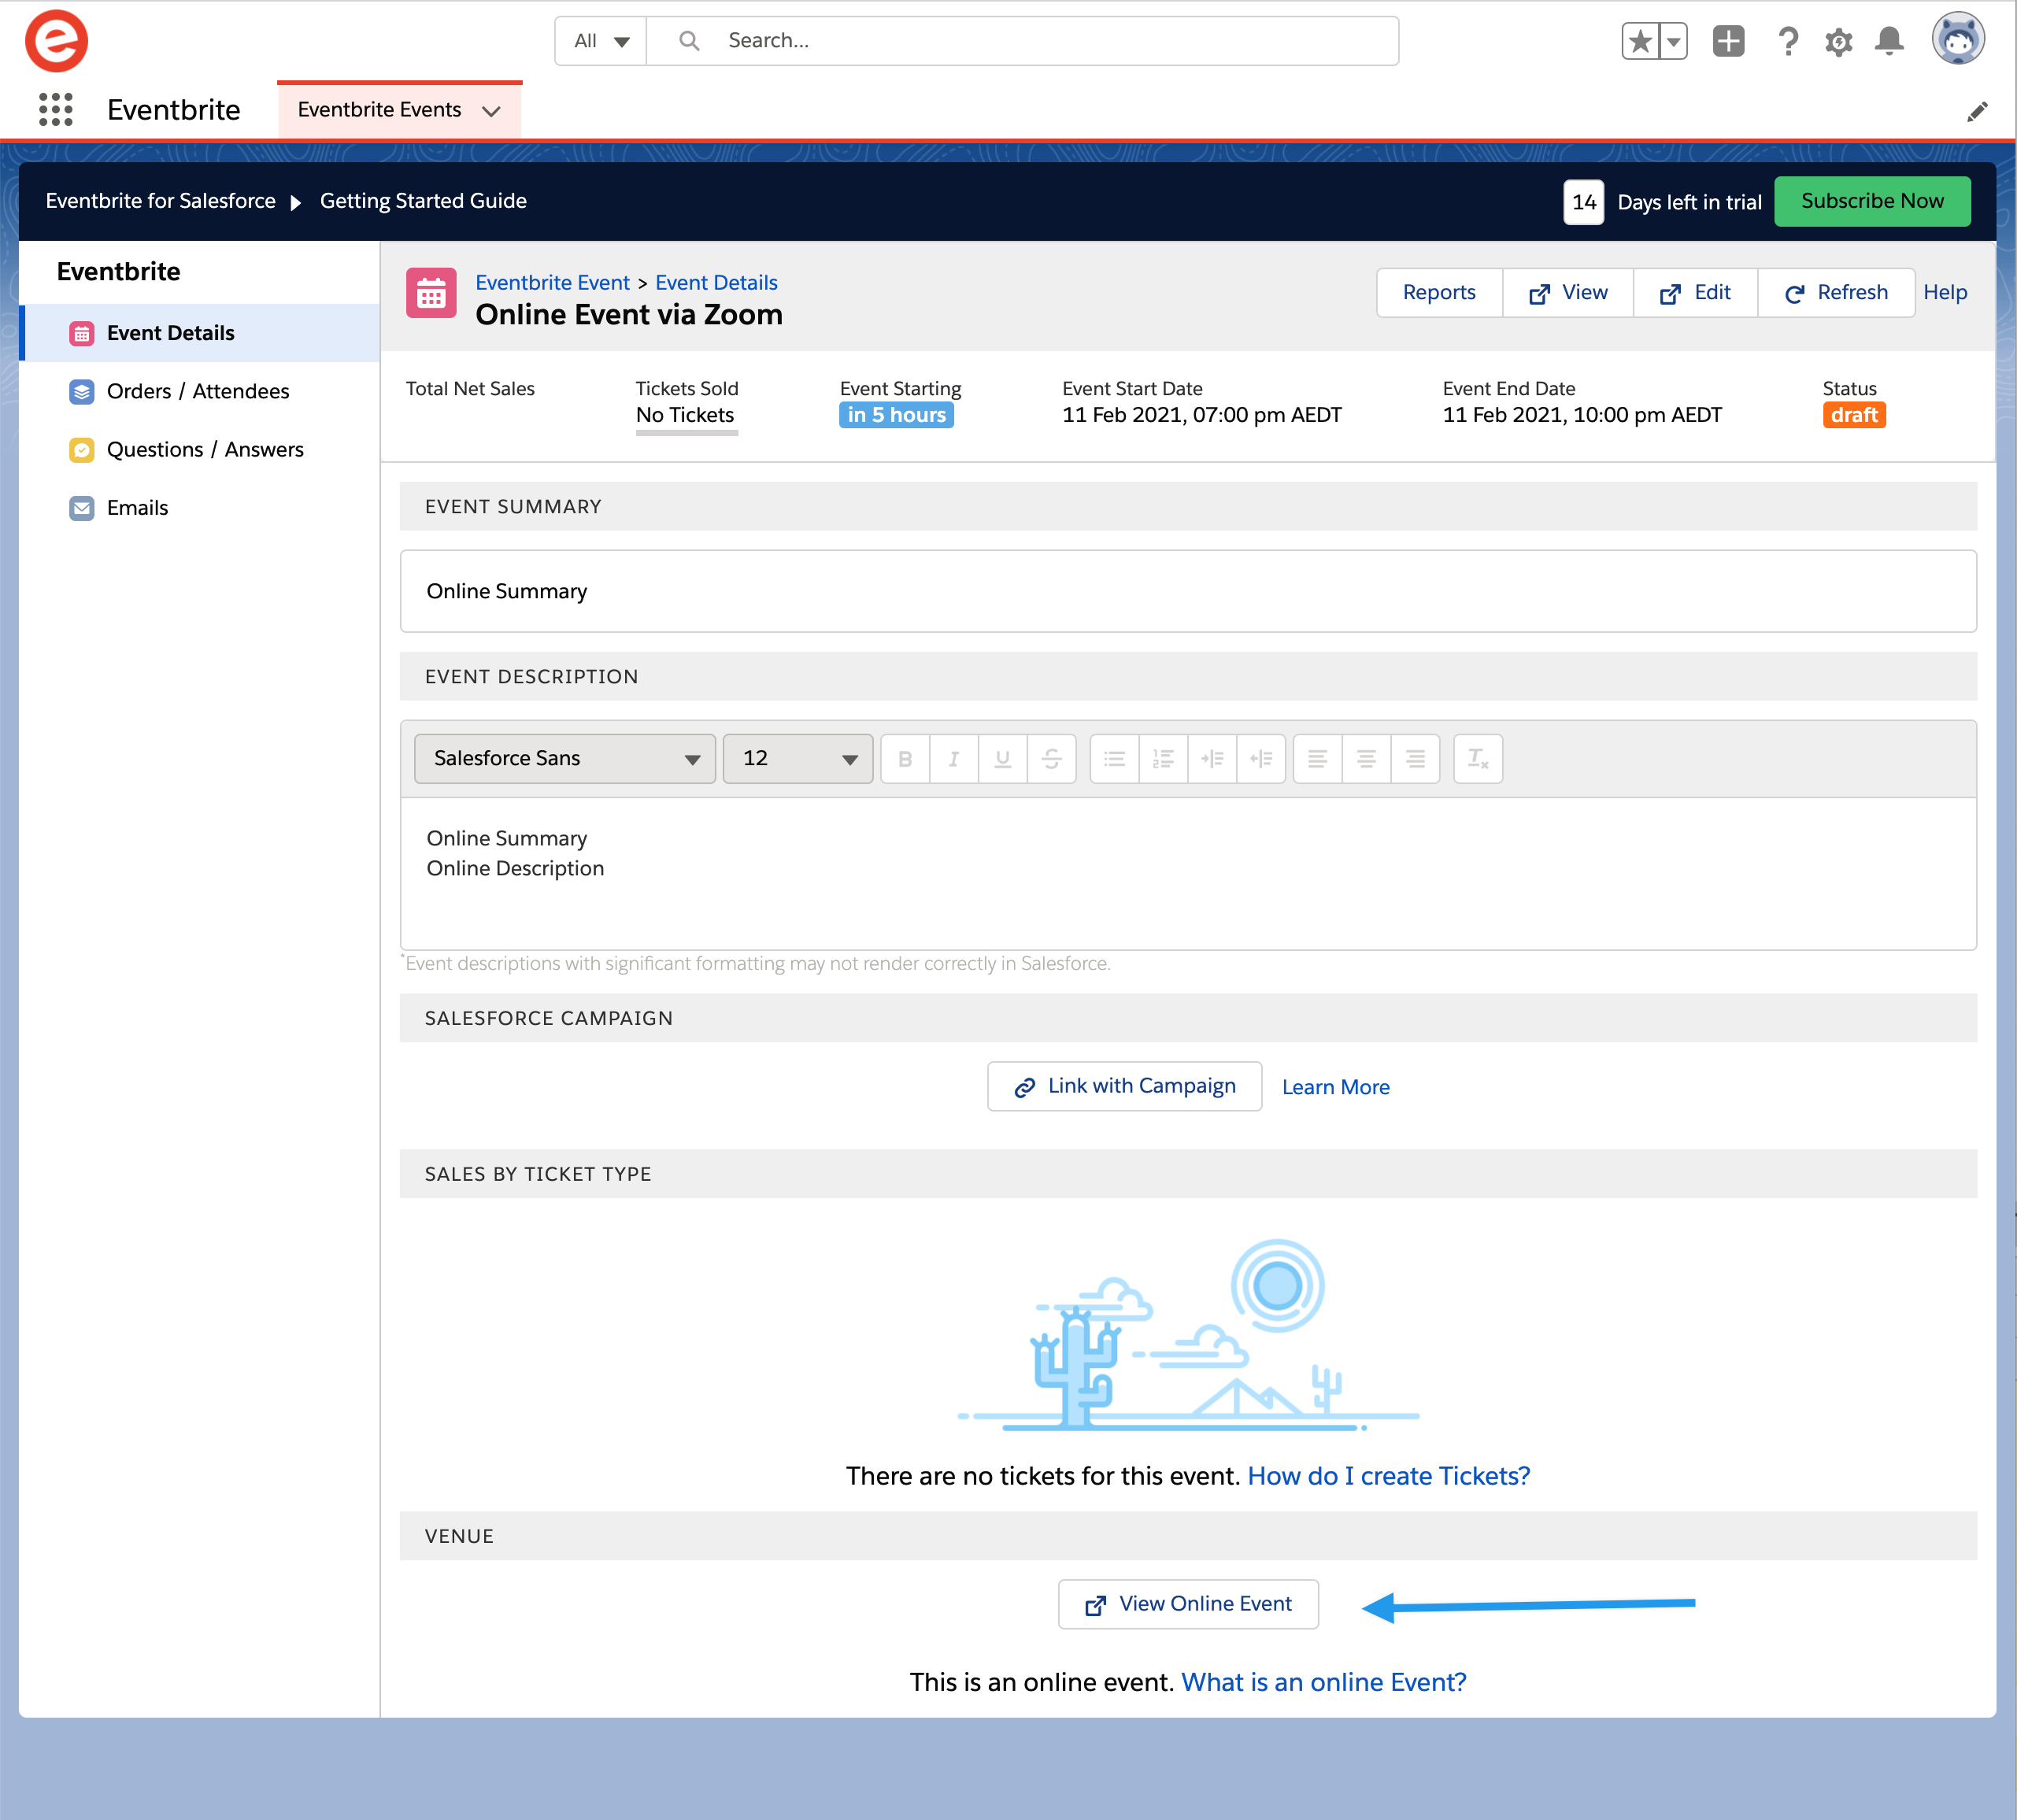
Online events
If there is an online event link within Eventbrite, (as illustrated below) will become enabled. Clicking this link will take you to the online URL.

Deleting events
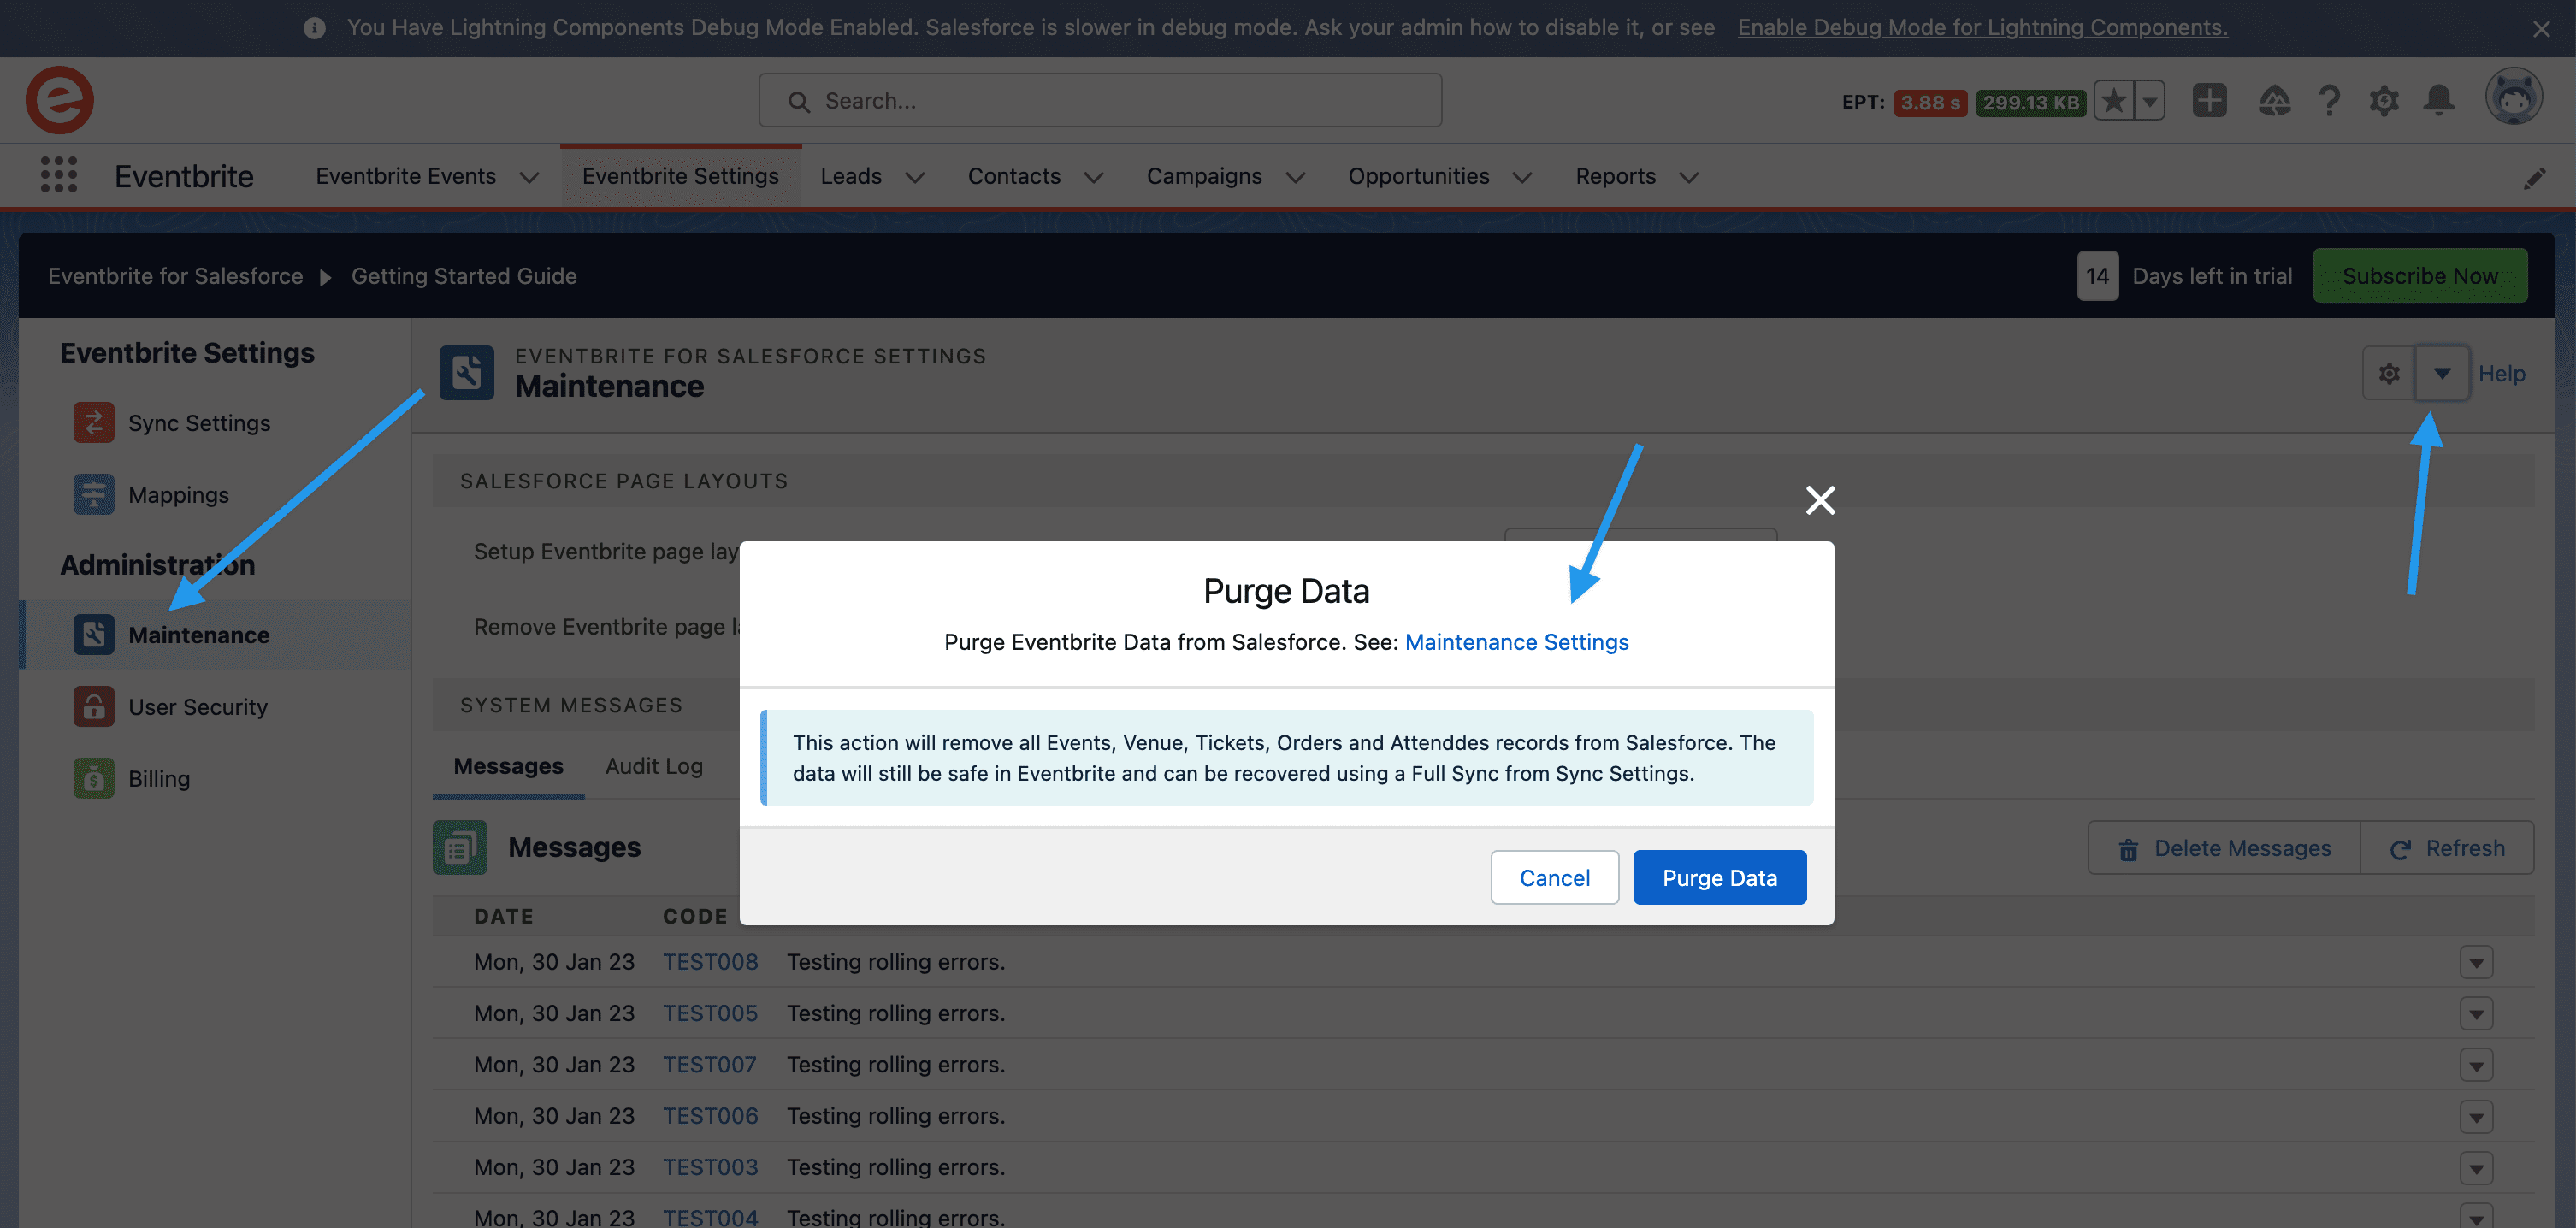
Although unsual it is possible to delete an event in Eventbrite. If that event has already been synced with Salesforce we will not delete it or any other related records. You can perform a purge which will delete all Eventbrite data in Salesforce. The data is safe in Eventbrite you can choose to perform a full sync that will restore the information in Salesforce (excluding any deleted event records).
How to perform a purge
1. Go to the CM Settings tab
2. Click Maintenance
3. On the top right next to the cog there is a dropdown menu click this and select purge.

Once the purge has completed all Eventbrite data will be removed from Salesforce. This does not include any standard records created by the integration for example accounts, contacts, leads, campaigns, campaign members or opportunities.


