Import Wizard
Add records from any Salesforce object to Emma via a list view, report, SOQL or Salesforce campaign.
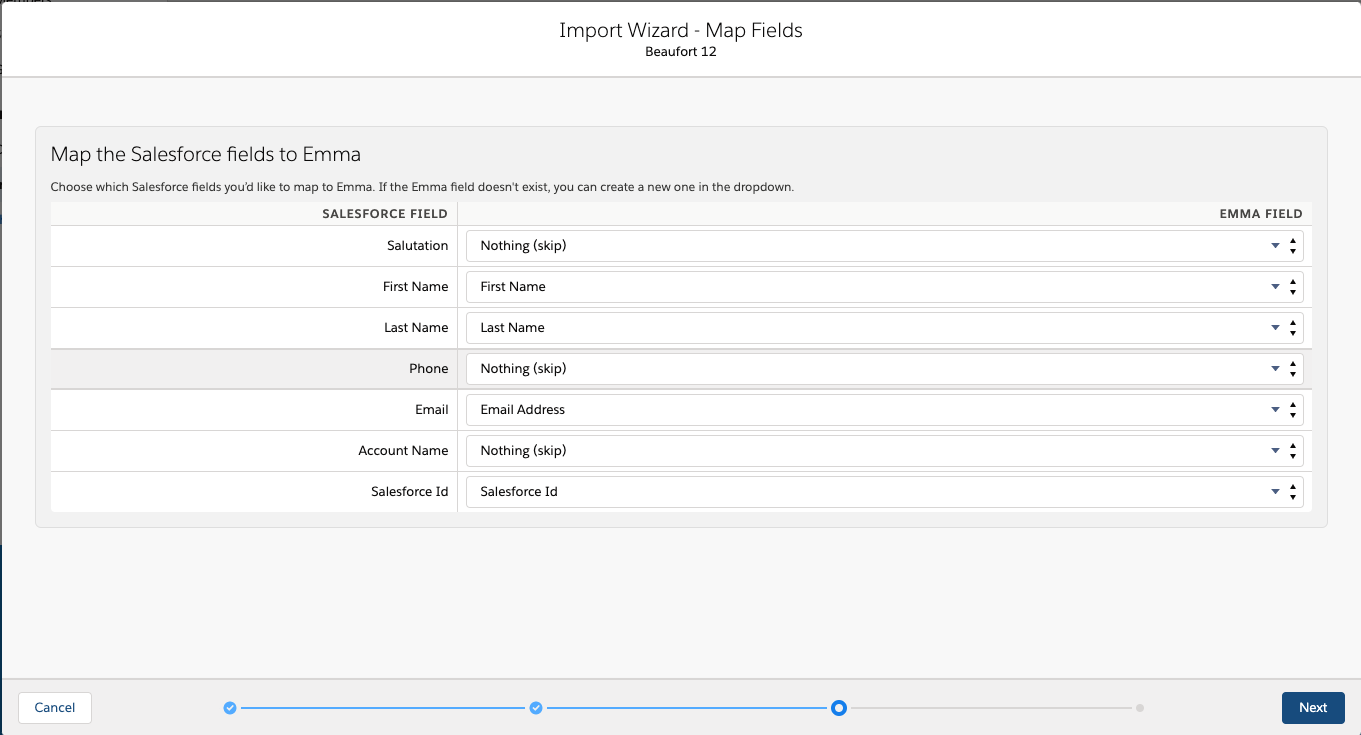
Map Salesforce fields to Emma custom fields to allow segmentation or personalization.
Add or remove records from Emma groups.
If you are working with an Emma HQ account it is not possible to add audience members to the parent level, make sure to connect a sub client.
Video overview
Creating an import

Please note that Salesforce limits, report imports to 50,000 records if you have more than this try using the SOQL, campaigns or list view approach. List view import is not available in Salesforce Professional.
Go to the Emma tab in Salesforce
Now click Import wizard then click the New import button.
The wizard will appear asking you to select between a Salesforce campaign, report, list view or SOQL statement.
The next screen depends on what you have selected, you will be asked to choose:
a. List view - an object and a list view.
b. Report - a folder and a report.
c. Campaign - a Salesforce campaign and a status (you can also choose all statuses).
d. SOQL - an editor that you can enter your query in and validate it.Next map Salesforce fields to Emma custom fields. If you already have custom fields in Emma, these will appear. If not you can create them from this screen. If you choose to map a Salesforce Contact or Lead ID we will use this to match records instead of an email address.
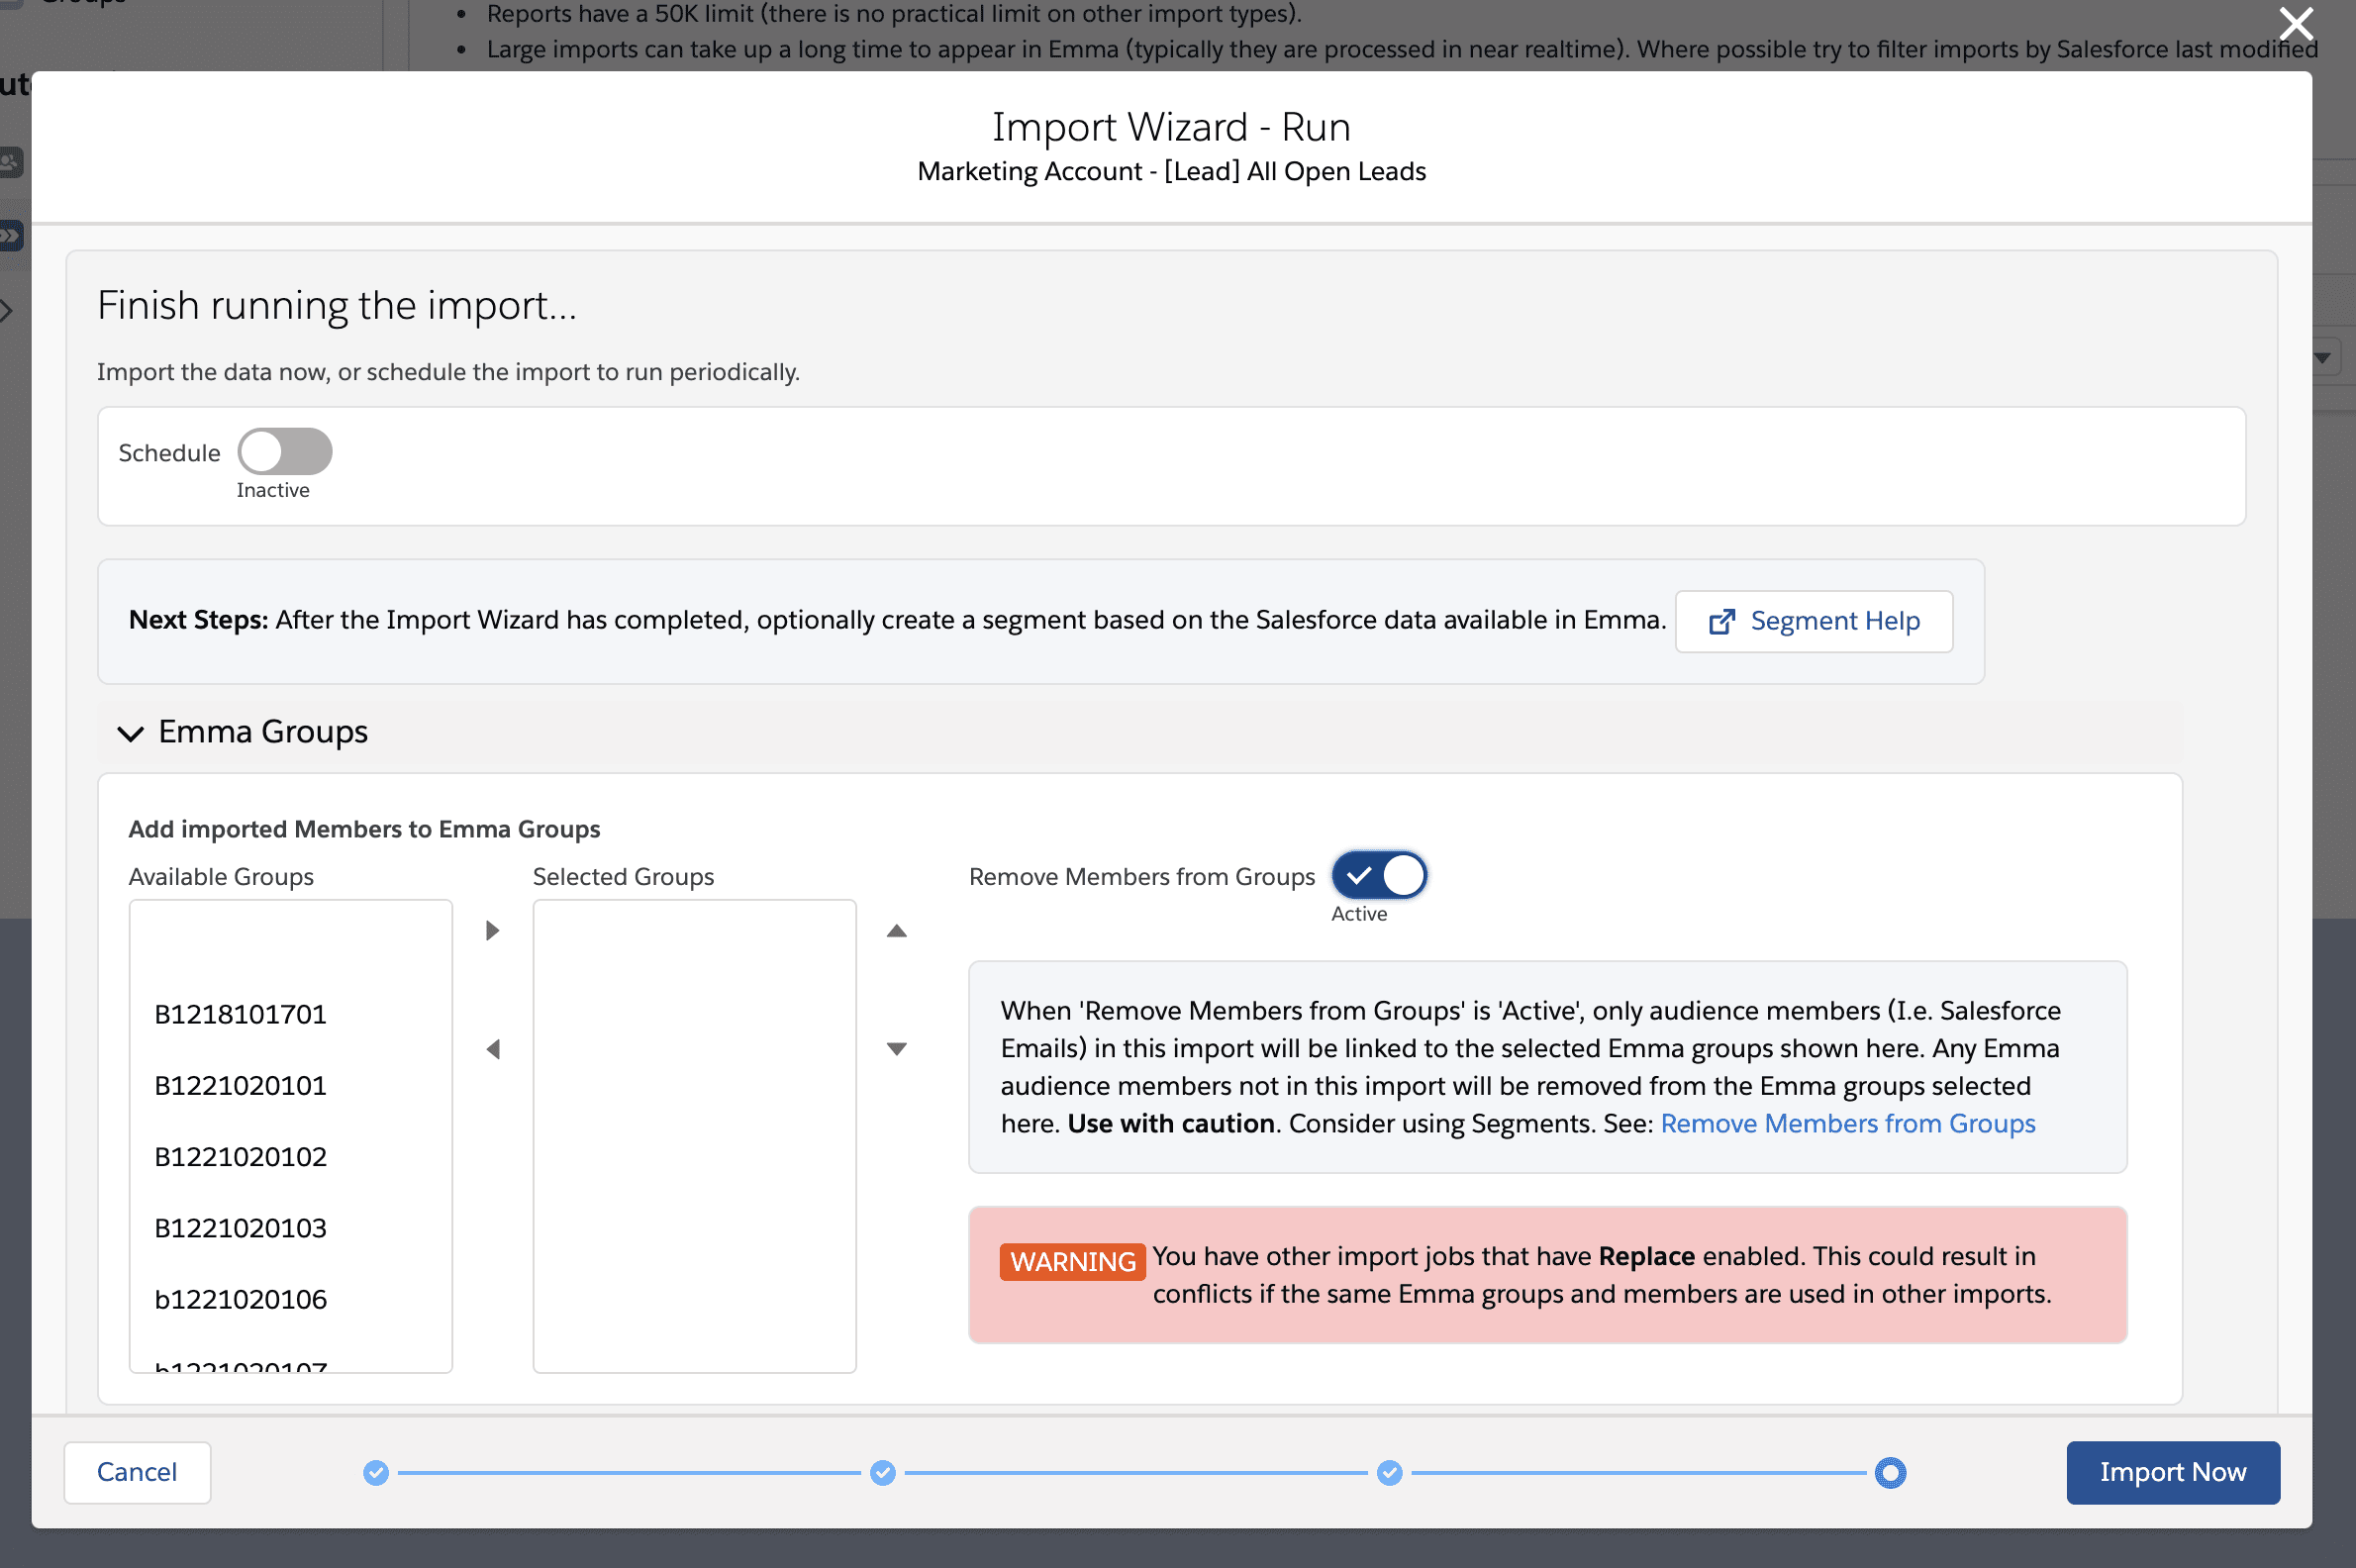
The wizard allows you to immediately Start the import, set up a Schedule for future runs or Both. If you choose to schedule you can select one, more or all run times. You can also select to add members to one or more Emma groups. And you can choose to remove members from groups.
There is also an Advanced settings which by default is collapsed. When expanded you can choose to add imported members to one or more groups. In addition you can enable the Remove members from groups options. When Remove members from groups is enabled, only audience members (i.e. Salesforce emails) in this import will be linked to the selected Emma groups. Any Emma audience members not in this import will be removed from the Emma selected groups selected .
Once submitted a subscriber import record will be created and visible on the import wizard section. Here you will be able to monitor the status of the import, see scheduling information, and view the results of a completed import. Every time an import runs it will add any new subscribers and update custom field mappings.
By default a record that has been archived in Emma will not be made active when the import wizard runs. This can be changed via Emma Settings please click here.
Remove

Examples
1. You have two scheduled imports one working with Group A and the other working with Group B. The replace option is enabled for both. This will work fine as the imports are working with two separate groups.
2. You have two scheduled imports one working with Group A and the other working with Group A & B. The replace option is enabled for both. Essentially this will not work as the two imports will conflict. Both will remove each other records from Group A.
Duplicates
Linking
Remove members from groups
Create your import as described above.
In the final step you will have the option to run or schedule the import.
Click on the Remove members from groups
We don't recommend using Emma Groups as there are limitations with the Emma API that could result in Rate Limit exceptions (errors will appear in the Maintenance Logs).
Consider using segments instead of Groups. These are driven from values field values in Emma that can be synced with Salesforce. They are far more flexible, dynamic and better supported. See: List segmentation
Updating an import
Go to the Emma tab
Now click Import wizard.
Click on the Dropdown arrow on the far right of the import you wish to Edit.
Click Edit.
Deleting an import
Go to the Emma tab
Now click Import wizard.
Click on the Dropdown arrow on the far right of the import you wish to Delete.
Click Delete.
View results
Go to the Emma tab
Now click Import wizard.
Click on the Dropdown arrow on the far right of the import you wish to view.
Click Results.


