Transactional emails
Transactional is only available to our Enterprise customers.
Send one off emails based on changes to Salesforce records.
Build customer journeys using Salesforce flows.
You can build a transactional email template in Campaign Monitor with variables. You can then map that template and any variables to a Salesforce record. Finally you can use Salesforce flows to trigger a Campaign Monitor transactionl email using our invokable action.
There are 3 steps in this process, explained in full detail below:
To use transactional emails you must:
1. Be on our Enterprise plan.
2. Have transactional included in your Campaign Monitor account.
3. Have set up email authentication for your Campaign Monitor account.
Interactive Steps
To help we have interactive steps just below, and further down the page we have step by step, additional information and screenshots.
Step by Step

1.Templates
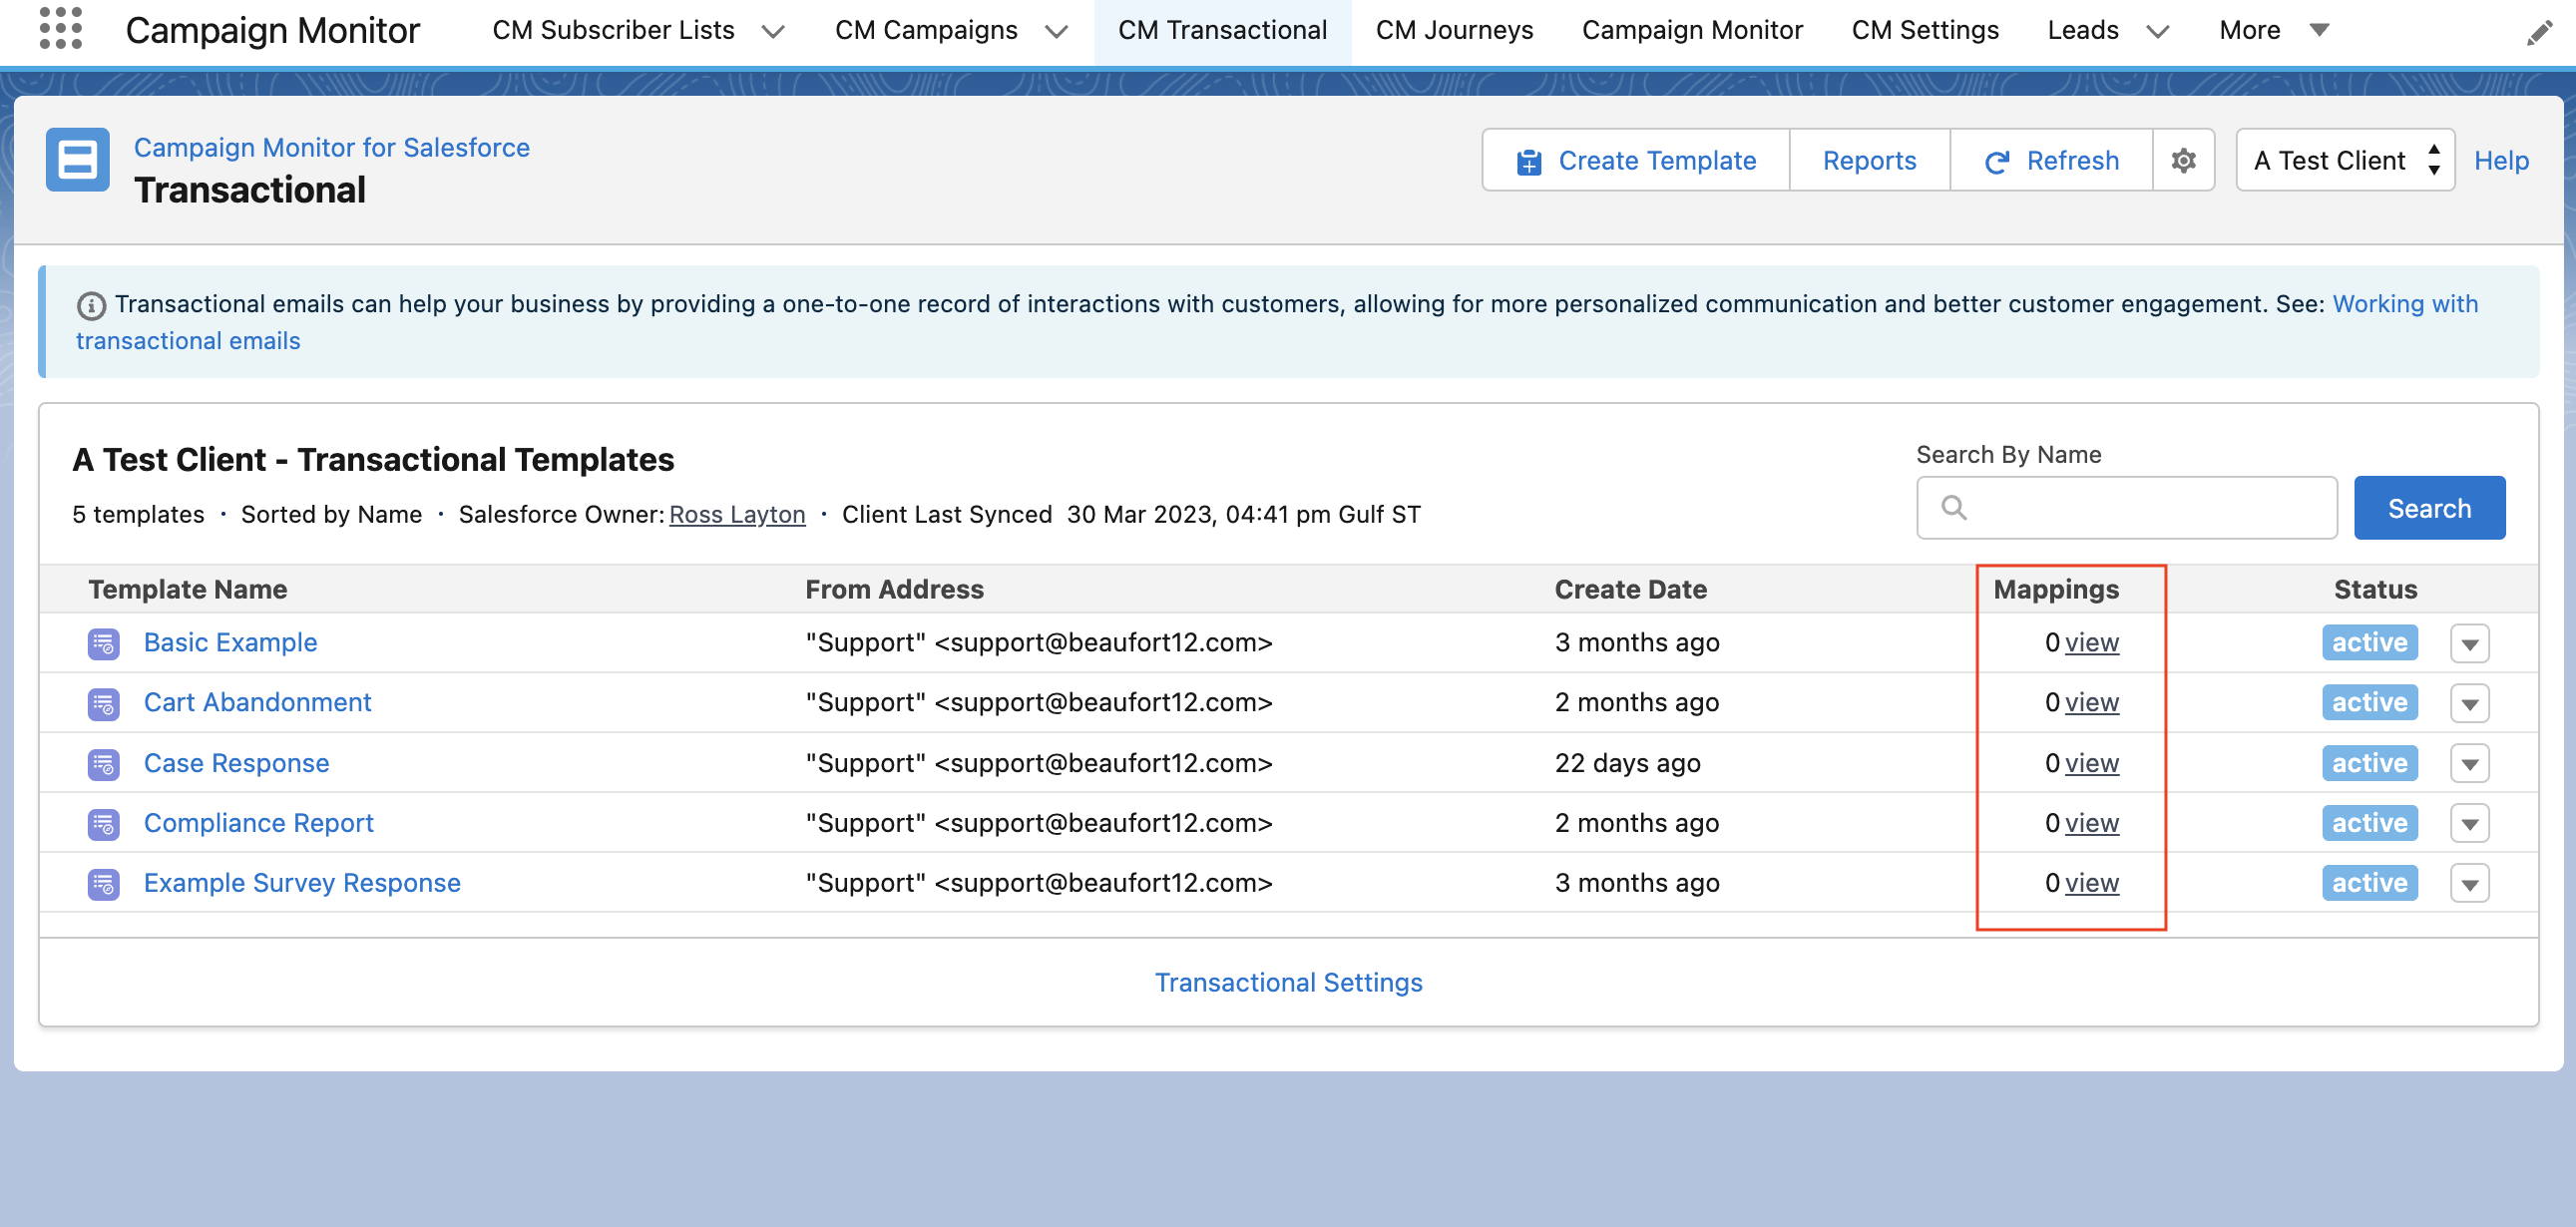
Smart email templates are where you design how your email looks, add content and set up variables to be populated with Salesforce data. If you already have templates they will be synced to Salesforce. If you need to create a template you can do so in Campaign Monitor to learn more Click here. Or you can create the directly from our Salesforce tab CM Transactional as show above. Simply click the Create Template button.
Should you have a question on how to create a smart email template please contact Campaign Monitor directly.
Campaign Monitor templates can be both HTML and text based. If you are changing variables on the HTML template you might also need to manually update the text version to ensure they are aligned.
2. Mappings
Once your templates are synced with Salesforce they will appear on the CM Transactional tab. To set up a new mapping simply click the view link next to the template you want to work with.

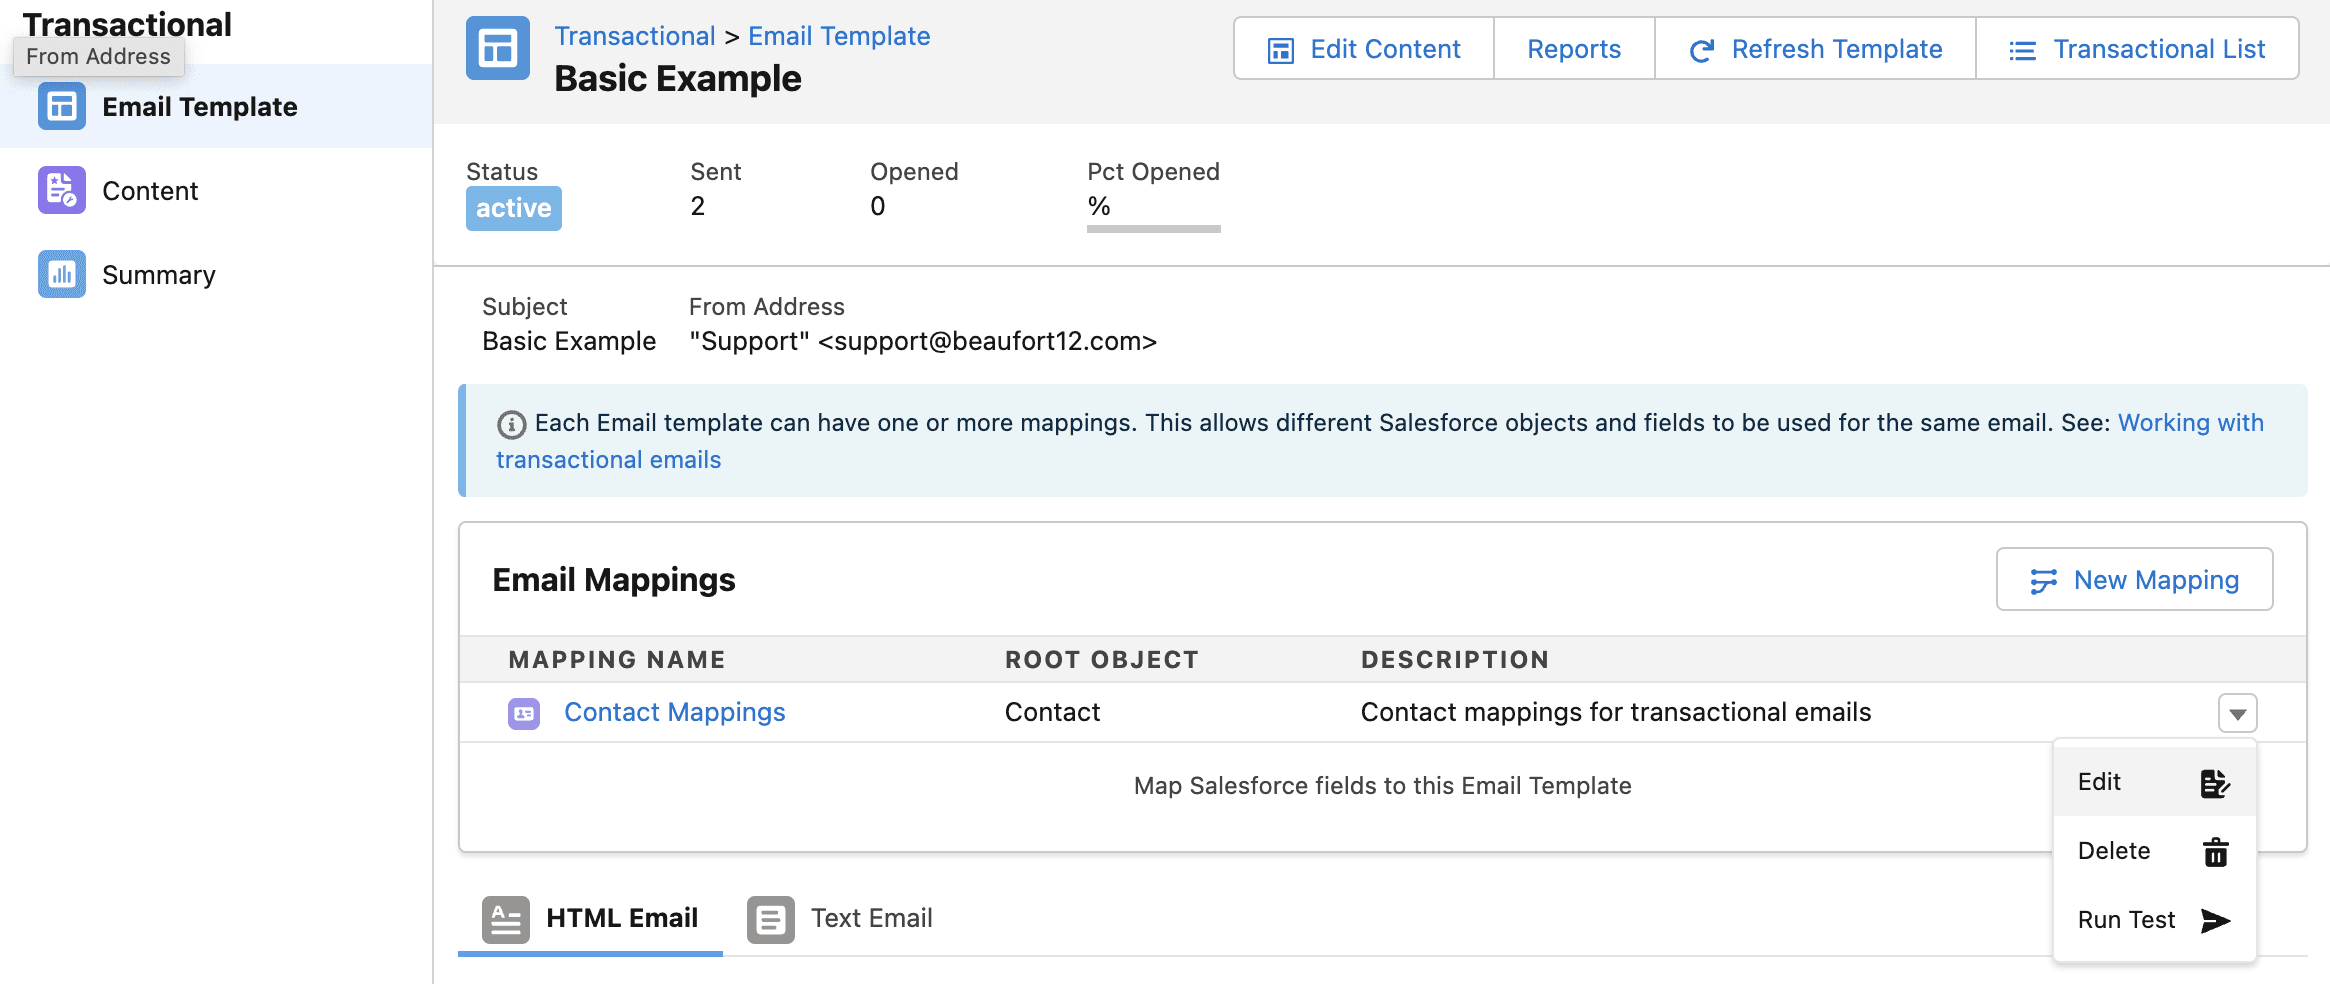
In the middle of the screen you will see an Email Mappings section. Click New Mapping.

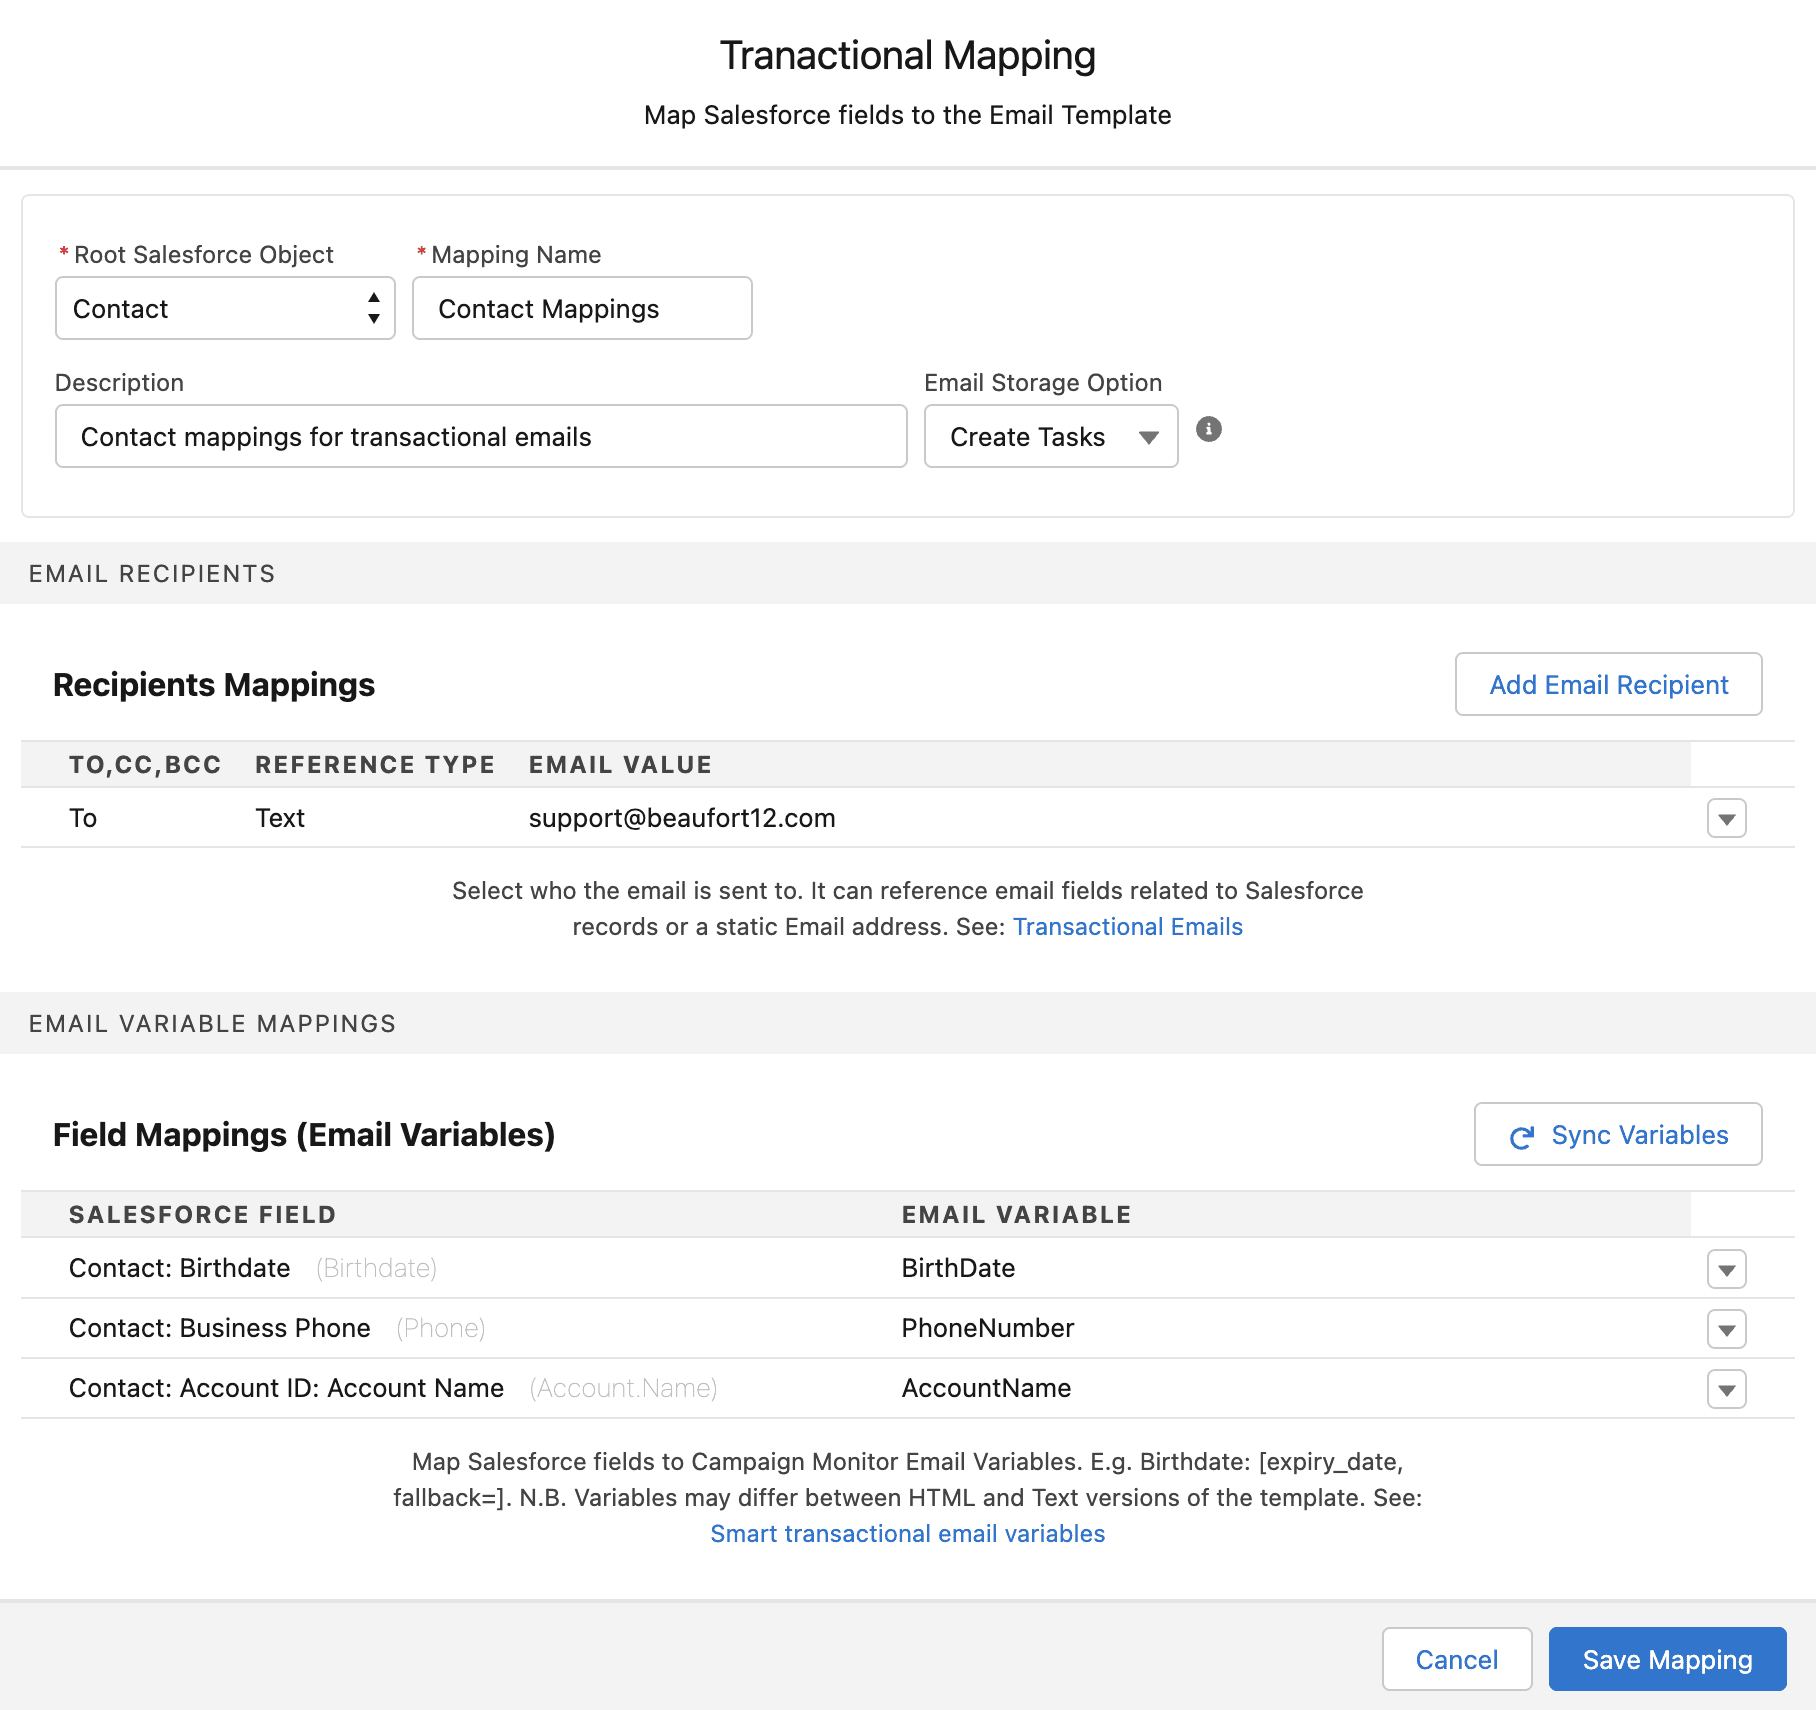
By doing this a modal will appear start by choosing the root Salesforce object. This is object that will both trigger the transactional email and also where you can map Salesforce data from. You can choose to give mappings a description.
Email Storage Option allows you to ptionally store transactional emails in Salesforce as Email Messages or Tasks. Email Messages and Tasks can only be created for objects with Activity enabled. Salesforce 'Enhanced Email' must be enabled when using Email Messages.
The next section is called Email Receipents it allows you to choose who to send the email to. You can choose from to, cc or bcc receipents. Start by click the add email receipient.
Polymorphic lookups (Tasks, Events) can not be used to populate recipients or merge fields in Mappings.
Typically an email template will have variables but it is optional.

When choosing a field to map for certain data types, like dates you will have the option to apply a format for example DD-MM-YY
Finally the field mappings section allows you to map Salesforce fields from your root object to one of the variables in your email template. Simply click the dropdown next to the variable and click edit mapping. From there you can navigate to a field on the object or a via a lookup.
Testing
We strongly recommend testing the email template works outside of a flow. To help we have a run test option. To find this simply click the dropdown next to the mapping and click Run Test as shown below. When the modal opens you will be prompted to enter in a Salesforce Record Id.

Please note that you will need transactional emails enabled in your Campaign Monitor account. If you have any questions on this point please contact Campaign Monitor directly.
3. Trigger
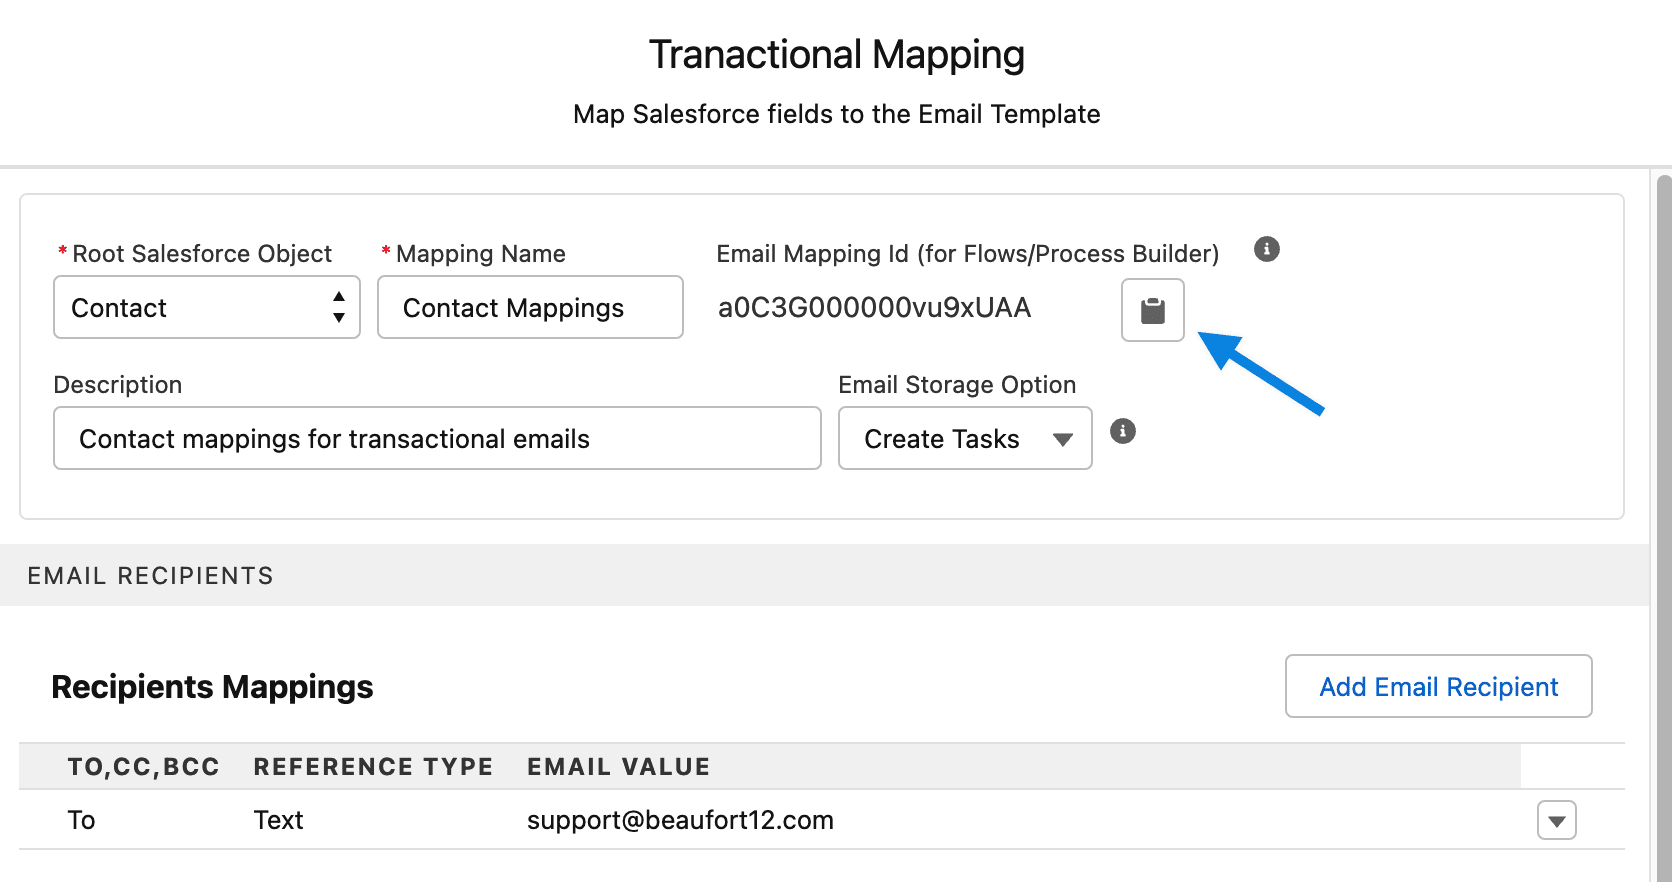
There are a fews to trigger transactional emails. The most popular way to trigger an email is using You will need the Smart email mapping ID as shown below, for ease click on the clipboard icon to copy.

Flow
Click Setup near the top right of your Salesforce account.
On the left in the quick find search box type process builder.
Below process automation, click Flows.
On the my flows page, click New Flow.
Select Record-Triggered Flow.
Select the object you wish to trigger the flow from.
- Configure the trigger
- Set any entry conditions
- Choose the appropiate optimization
In between the start and end click the plus symbol.

- Choose action from the interaction add element menu.
- In the search type Transactional Email and click done.
Set the action attributes

- Type in a label name
- Optionally set a description
- Set the Record Id values to {!$Record.Id}
- Paste in the Smart Email Mapping ID
- You don't need to enable the Direct option see below for more information.
Click Done.
Click Save, and enter a name and description for the flow and click Save.
Click Activate.
Guest Site User
Salesforce has strict security controls for guest users, requiring explicit permissions and sharing rules to grant access to data. Salesforce, admins must configure both object, field and record access for guest users. Assigning the Guest Permission Set allows access to key objects like subscriber lists and mailing campaigns, but additional access is needed for leads, contacts, and person accounts, including lookup and formula fields.
Sharing rules must be set up to allow guest users to access specific records, such as Smart Emails for transactional emails, Custom Field Mapping for field mappings, and Automatic Subscription for subscriber rules. Additionally, Contact records must be linked to Accounts to ensure access, as child objects inherit permissions from their parent objects. Salesforce provides resources like videos and documentation to help configure guest user access correctly.
Please see our dedicated FAQ for more information.
Direct Option
To allow transactional mappings to work in bulk we queue records for processing. For most customers this is needed and should not be changed. However, you can bypass this table by setting the direct parameter to True. It worth noting that the direct option will not work well with bulk sends and therefore should only be used if you have been instructed to do so.
When our invokable action is fired it is important that the user that triggered the action has one of our permission sets. This applies equally to automated users like the guest site user.
Deleting templates
You can delete a transactional template directly in Campaign Monitor. If you do so the next time the sync runs this template will be marked as deleted. If you wish to remove the template completley from Salesforce you can click on the dropdown to the right and select 'Purge Template'.
Tracking History
Smart Emails use a different set of Campaign Monitor APIs and do not work the same as campaigns or journeys. To learn more please click here.


